Build your own raised vegetable patch

In a raised vegetable patch the growing level is elevated above the ground. Generally speaking, a raised vegetable patch provides good drainage, meaning that excess water drains away more efficiently, preventing it from stagnating in the soil. Drainage capacity is actually linked to the effect of gravity: the higher the substrate, the better the water percolates.
You can raise your growing level in several ways. Mounding involves shaping the soil into raised seedbeds (called ridges or berms). Another way is to fill large containers (planter boxes) of the desired height with soil. Whereas mounding needs to be redone every year, a planter box is designed to last. Today we'll see how to make your own raised vegetable patch using a planter box system.
Advantages of a raised vegetable patch in planter boxes
Building your own raised vegetable patch with planter boxes is demanding both in terms of time and labour, and due to the cost of the construction materials (unless they are recycled) and the substrate that you fill the boxes with. In return, however, you get efficient drainage and a host of other advantages:
-
Control: fill the box with good-quality substrate, to compensate for poor or infertile soil in your garden, or choose a specific substrate for plants with specific needs.
-
Fewer weeds: the substrate is kept away from the ground and any weed seeds which the soil naturally retains; for the substrate, you can use either potting mix, which is sterilised, or mature compost and manure, which are devoid of viable seeds, so they won’t germinate.
-
Productivity: you have a longer growing season because the soil in a raised vegetable patch warms up faster in spring and retains heat for longer in autumn.
-
Convenience: you can choose the height of the raised beds according to your preference and needs. For example, a raised planting surface reduces strain on the knees and back, allowing you to work while sitting or standing, besides making the garden more accessible to children.
-
Tidy: raised beds are separated from the rest of the garden, well demarcated and protected from accidental trampling, so are less subject to compaction and more hospitable for plants.
-
Off-limits to animals: planter boxes also act as a barrier against damage to plants that can potentially be caused by pets, farmyard animals and wildlife.
-
Protection: the box edges are helpful when you need to build structures to protect your vegetable patch against the cold in winter and, when necessary, against excessive sun exposure in summer.
-
Aesthetically pleasing: well-built planter boxes add value to the garden, making it look well-kept and pleasing on the eye — not to mention tidier, as we already mentioned.
The efficient drainage achieved with a raised vegetable patch is useful in rainy areas. On the other hand, wherever rain is scarce, it can dry out the substrate too quickly: in this case, growing on a raised vegetable patch is not the ideal choice. We talk about water scarcity and how to save this resource when growing produce in our article on dry farming.


Building a planter box for your raised vegetable patch
Just as you would for a “standard” vegetable patch, choose a sunny spot for your raised vegetable patch, one that is as open as possible, free from shade and conveniently located near a water source and your tool shed.
If the planter box will rest directly on the ground, prepare the area by clearing away grass, for example with a lawnmower or brushcutter. Then, loosen the soil using a spade, rotary tiller or two-wheeled tractor. The surface of the raised bed must be level, so flatten it out if there are any small height differences.
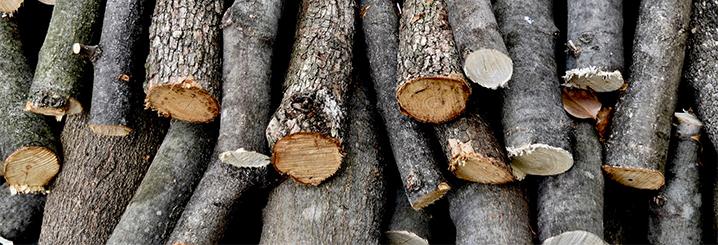
You can purchase raised vegetable beds in ready-to-assemble kits made of wood or metal, for example. If you instead opt to build your own raised vegetable bed, you can make the container out of wood, steel or galvanised sheet metal, brick, stone, or UV-resistant plastic. These materials vary in durability and price and can be new or recycled. If you use recycled materials like pallet wood, make sure they are durable and safe (not treated with harmful substances such as paints or glues that could leach into the substrate). Although OSB is known for its practicality and strength, avoid using OSB panels because the wood chips they consist of are held together by resins or glues. If using pallet wood, you may find that a chainsaw comes in handy for dismantling the pallets quickly, rather than struggling with a crowbar and hammer.
How to build your own raised vegetable patch? What is the best material to use? Each has its advantages and disadvantages. Wood is an economical solution and is easy to obtain and work with, which is why it’s commonly used to build raised vegetable beds. On the other hand, it is perishable, especially if exposed to bad weather and moist soil. You can protect it by applying a primer and insulating the walls of the box from the substrate with plastic sheeting.
Once you've chosen the location for your raised vegetable patch, prepare the area and assemble the planter box. The box is bottomless, consisting only of side walls that elevate the growing area and hold the substrate. The construction method is determined not only by the material, but also its format (depending on whether you use wooden panels or planks, for example), the desired dimensions of the box and so on.
The measurements of the planter box are entirely at your discretion. We recommend taking into account ergonomics, so that you can work better and more comfortably. The width should therefore not exceed 1.2 m to 1.5 m, so that you can reach the centre of each raised bed with your arms. As for the length, it shouldn’t make it difficult to walk from one side of the box to the other. In addition to ergonomic considerations, the height of the raised bed will depend on the substrate you are using and the roots of the plants you want to grow (which will be at least 20 cm deep). Depending on the crop, the ideal height can range from 30–40 cm to 70–80 cm or more. An optimal height could be around 50 cm. Leave at least 60 cm of space between each planter box, so you can pass between them easily (and if using a wheelbarrow, take this into account too).


Filling the planter boxes
Now let's talk about the substrate, which is the soil mix in which the plants of your DIY raised bed will grow. You have various solutions for filling the planter boxes of your vegetable patch. You can use soil from your garden mixed with compost or well-rotted manure—even sand, if needed—to make it more fertile. To do this, remove weeds by hand in a corner of the garden (don’t use weedkiller), then work the soil in that area with a spade or using a rotary tiller or two-wheeled tractor. Scatter the necessary nutrients to improve the soil’s fertility and incorporate them with a second tilling, then use this improved soil to fill the planter boxes.
Finally, you can mulch your raised beds to protect the substrate from excessive evaporation and intense sunlight. Here you can learn more about mulching, which is useful in both summer and winter.
At the bottom of the boxes, you can lay wire mesh on the ground to protect the raised beds from moles, voles and mice, and cover it with a mulching sheet or cardboard to prevent weeds from growing. Here you'll find our tips for keeping moles, mice and other rodents away from your vegetable patch and garden.
Alternatively, you can create a lasagna garden bed, for example by laying a draining base made of branches and twigs and then adding soil mixed with well-rotted manure/compost to act as a seedbed. Instead of natural soil from your garden, you can use soil purchased specifically for this purpose. Between the drainage and fertile layers, you can add dry, fresh organic material, which will decompose and become nutrients for the plants. You can finish off with a mulch layer, such as straw.
Regardless of the substrate you decide to use, the growing surface will sink over time as the organic materials and mulch become depleted due to decomposition. Therefore, the substrate must be partially replenished every year.
A raised vegetable patch offers a way to grow vegetables even on various hard surfaces, such as on terraces, patios or other paved outdoor surfaces. In this case, the box doesn’t require foundations but must have a closed base. When filling it, add a layer of gravel at the bottom, about ten centimetres deep, for drainage.
If you are a beginner, we recommend reading our overview of how to grow a vegetable patch and our focus article on how to divide it up into beds. You can also check out our rundown of useful tools for gardening, from tilling soil to tending vegetables.
Related articles

Natural remedies for getting rid of mosquitoes in the garden

Orchards: all the tips and tricks

Secrets to successful squash growing